In July this year, the hedgehog species was classified as vulnerable to extinction by the International Union for the Conservation of Nature’s (IUCN) Red List for British Mammals (Source: https://www.britishhedgehogs.org.uk/british-hedgehog-now-officially-classified-as-vulnerable-to-extinction/). This was a really sad reality check which makes us all realise that our natural wildlife in the UK is becoming more threatened as the days go by. Just take a moment to think about the last time you saw a hedgehog in the wild? We used to frequently get hedgehogs in the garden when I was a kid, but that’s something that hadn’t happened for a long time….until now!
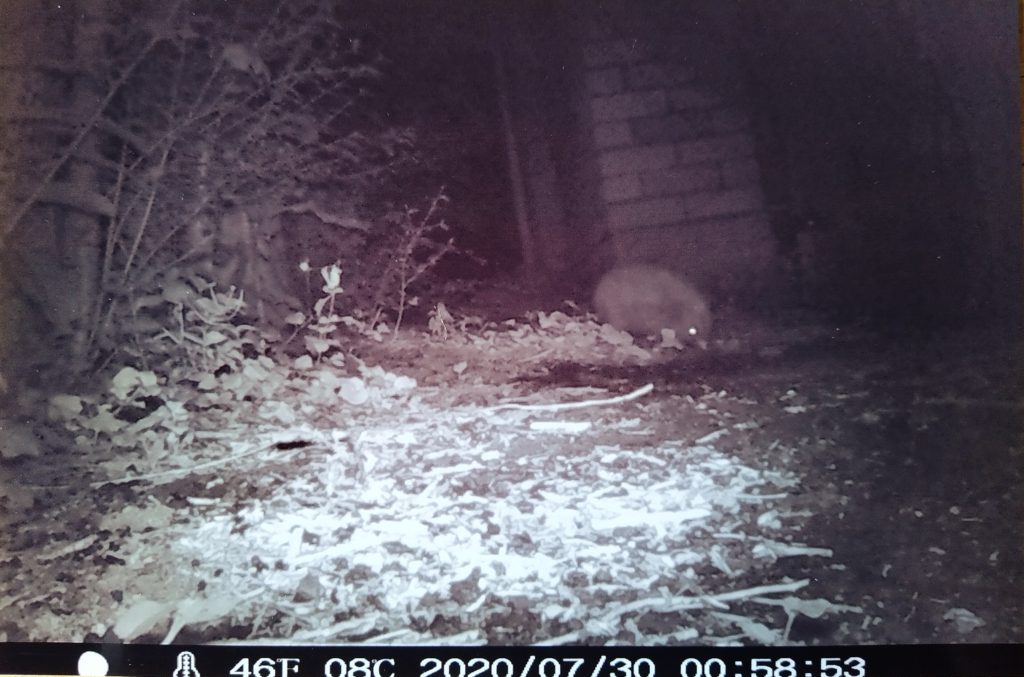
We were approached by the Shropshire Wildlife Trust who were carrying out a hedgehog population survey led by their Hedgehog Officer Kathryn Jones in our village. She visited us back in July with a motion-sensor camera which we were skeptical would catch more than the neighbour’s cats, but amazingly we captured footage of a spiky visitor to our garden.
After being inspired by the knowledge that there was hedgehog activity in our garden, we decided to do what we could to encourage them in. We have plenty of wild spaces and access in and out of the garden which is good for hedgehogs, but we started to put out water and specific hedgehog food for them. You can buy hedgehog food from a household store such as Wilko’s or visit https://www.arkwildlife.co.uk/category/wildlife-food/hedgehog-food-uk/ for ideas on types of food to buy. If you don’t have hedgehog access naturally in your garden, you could buy some hedgehog friendly gravel boards from somewhere like https://www.shropshirefencingsupplies.co.uk/boards which will encourage hedgehogs into your garden. Hedgehogs also rely on leaves to make their nests for hibernation, so instead of raking them up and disposing of them why not put them in a pile in the corner of your garden for hedgehogs to use.
This was our first phase of becoming a hedgehog friendly household, but I wanted to take this even further and build a house for our little resident. I built a wooden hedgehog house when I was a kid with my Dad, but this had long since past its best so I set out to build a new one. We followed the instructions on the Wildlife Trust’s website (https://www.wildlifetrusts.org/actions/how-build-hedgehog-home), and sourced all of the components from Wickes;
- 20mm untreated non-structural plywood board
- 2x metal hinges
- 1.5″ wood screws
- 3″ wood screws
- Plastic 90° bend pipe fitting
To carry out this job the following tools were used;
- Hand saw
- G clamp
- Straight edge/ruler
- Pencil
- Drill & bits
- Screwdriver
- Multitool (optional, we used it to make the design improvements)
- Sander (this isn’t strictly necessary but we didn’t want our hedgehog getting wood splinters!)

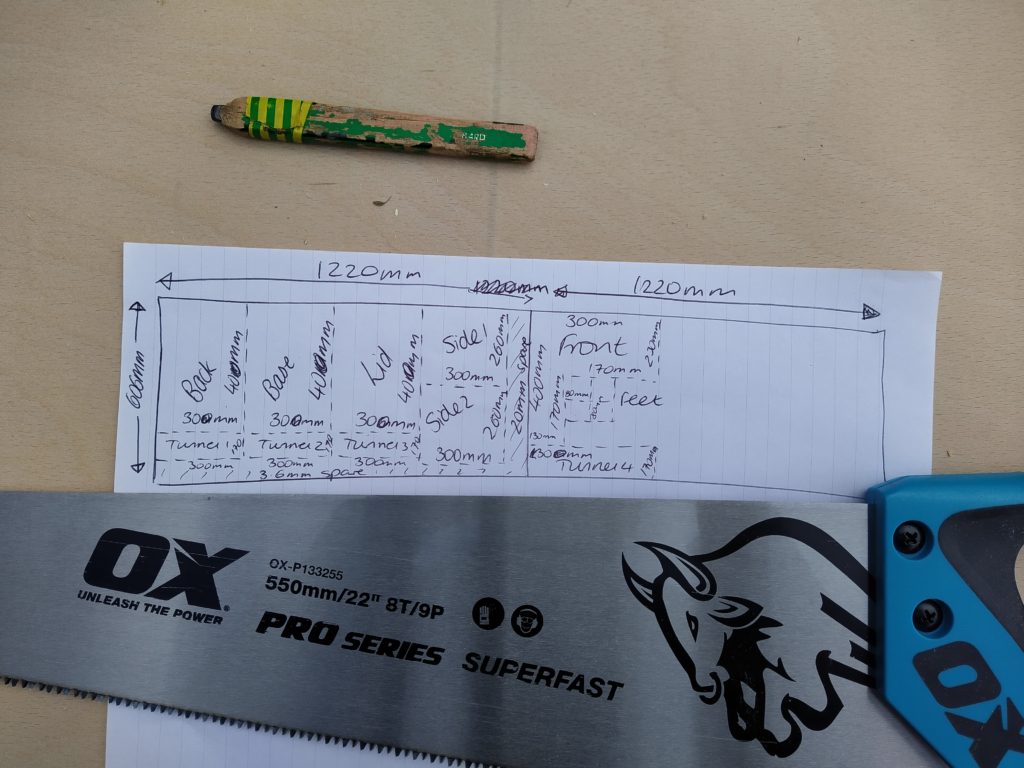
Before I bought the plywood I drew out the required pieces for the hedgehog house to plan how big a board I would need. This also meant it was much quicker cutting the pieces out because we already knew where the pieces need to be cut from to maximise the size of the board. It’s important to plan your work out like this, as it makes it a lot easier when it comes to marking and cutting the wood out, instead of just working it all out when you’re doing the job.
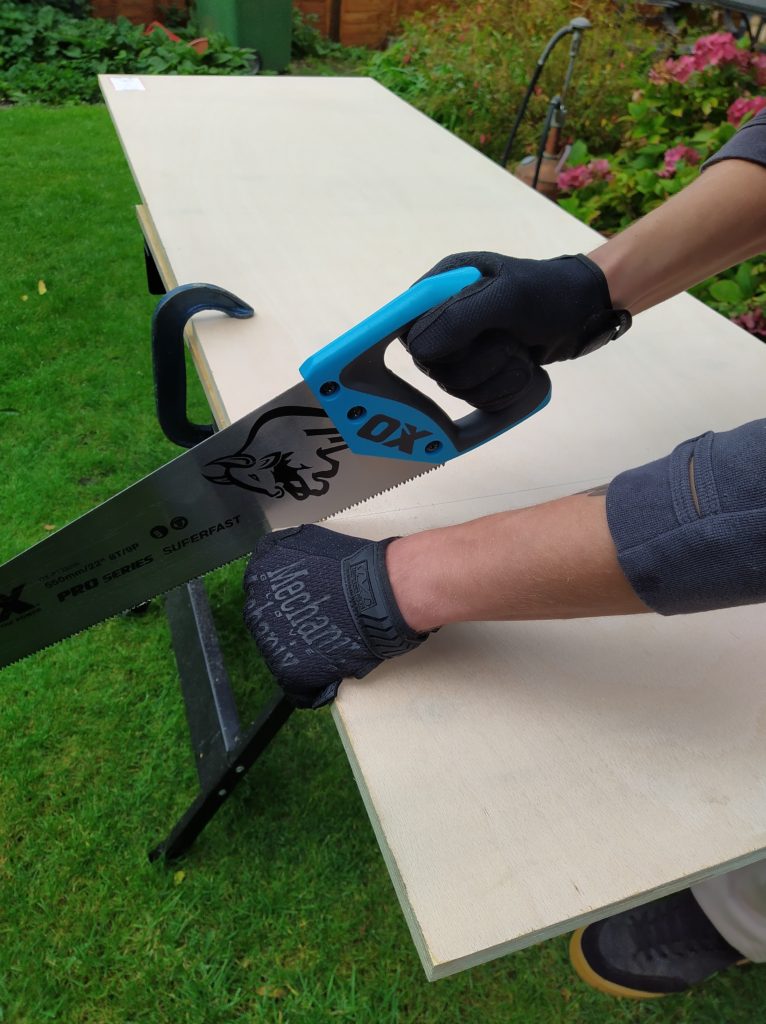
We made sure to measure and measure again when cutting out the pieces of the house, as we didn’t want to waste any wood or make any incorrect cuts. It’s important to measure one piece at a time instead of marking it all out at once, as you have to account for the width of the saw blade which is hard to measure. It just makes it easier to work through by measuring one out, cutting it out and then moving to the next piece.
We used a hand saw but if you have a chop saw you could use this to save time. We used our workbench and clamped the wood onto this carefully, making sure it was clamped as close as possible to where the cut was being made.
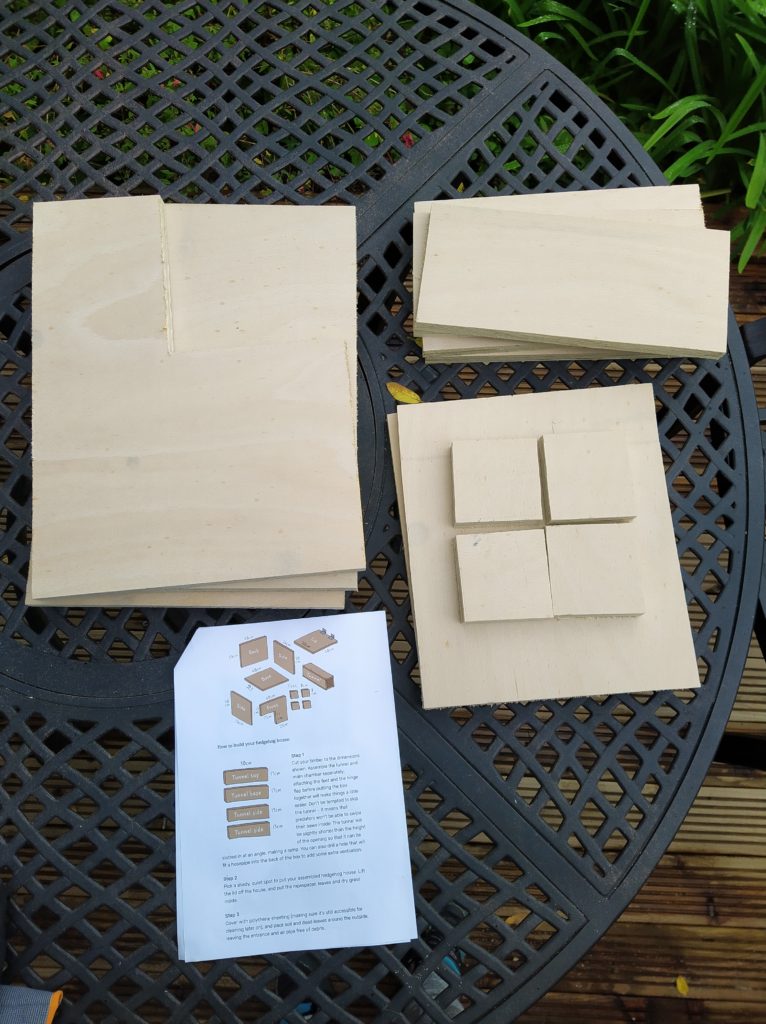
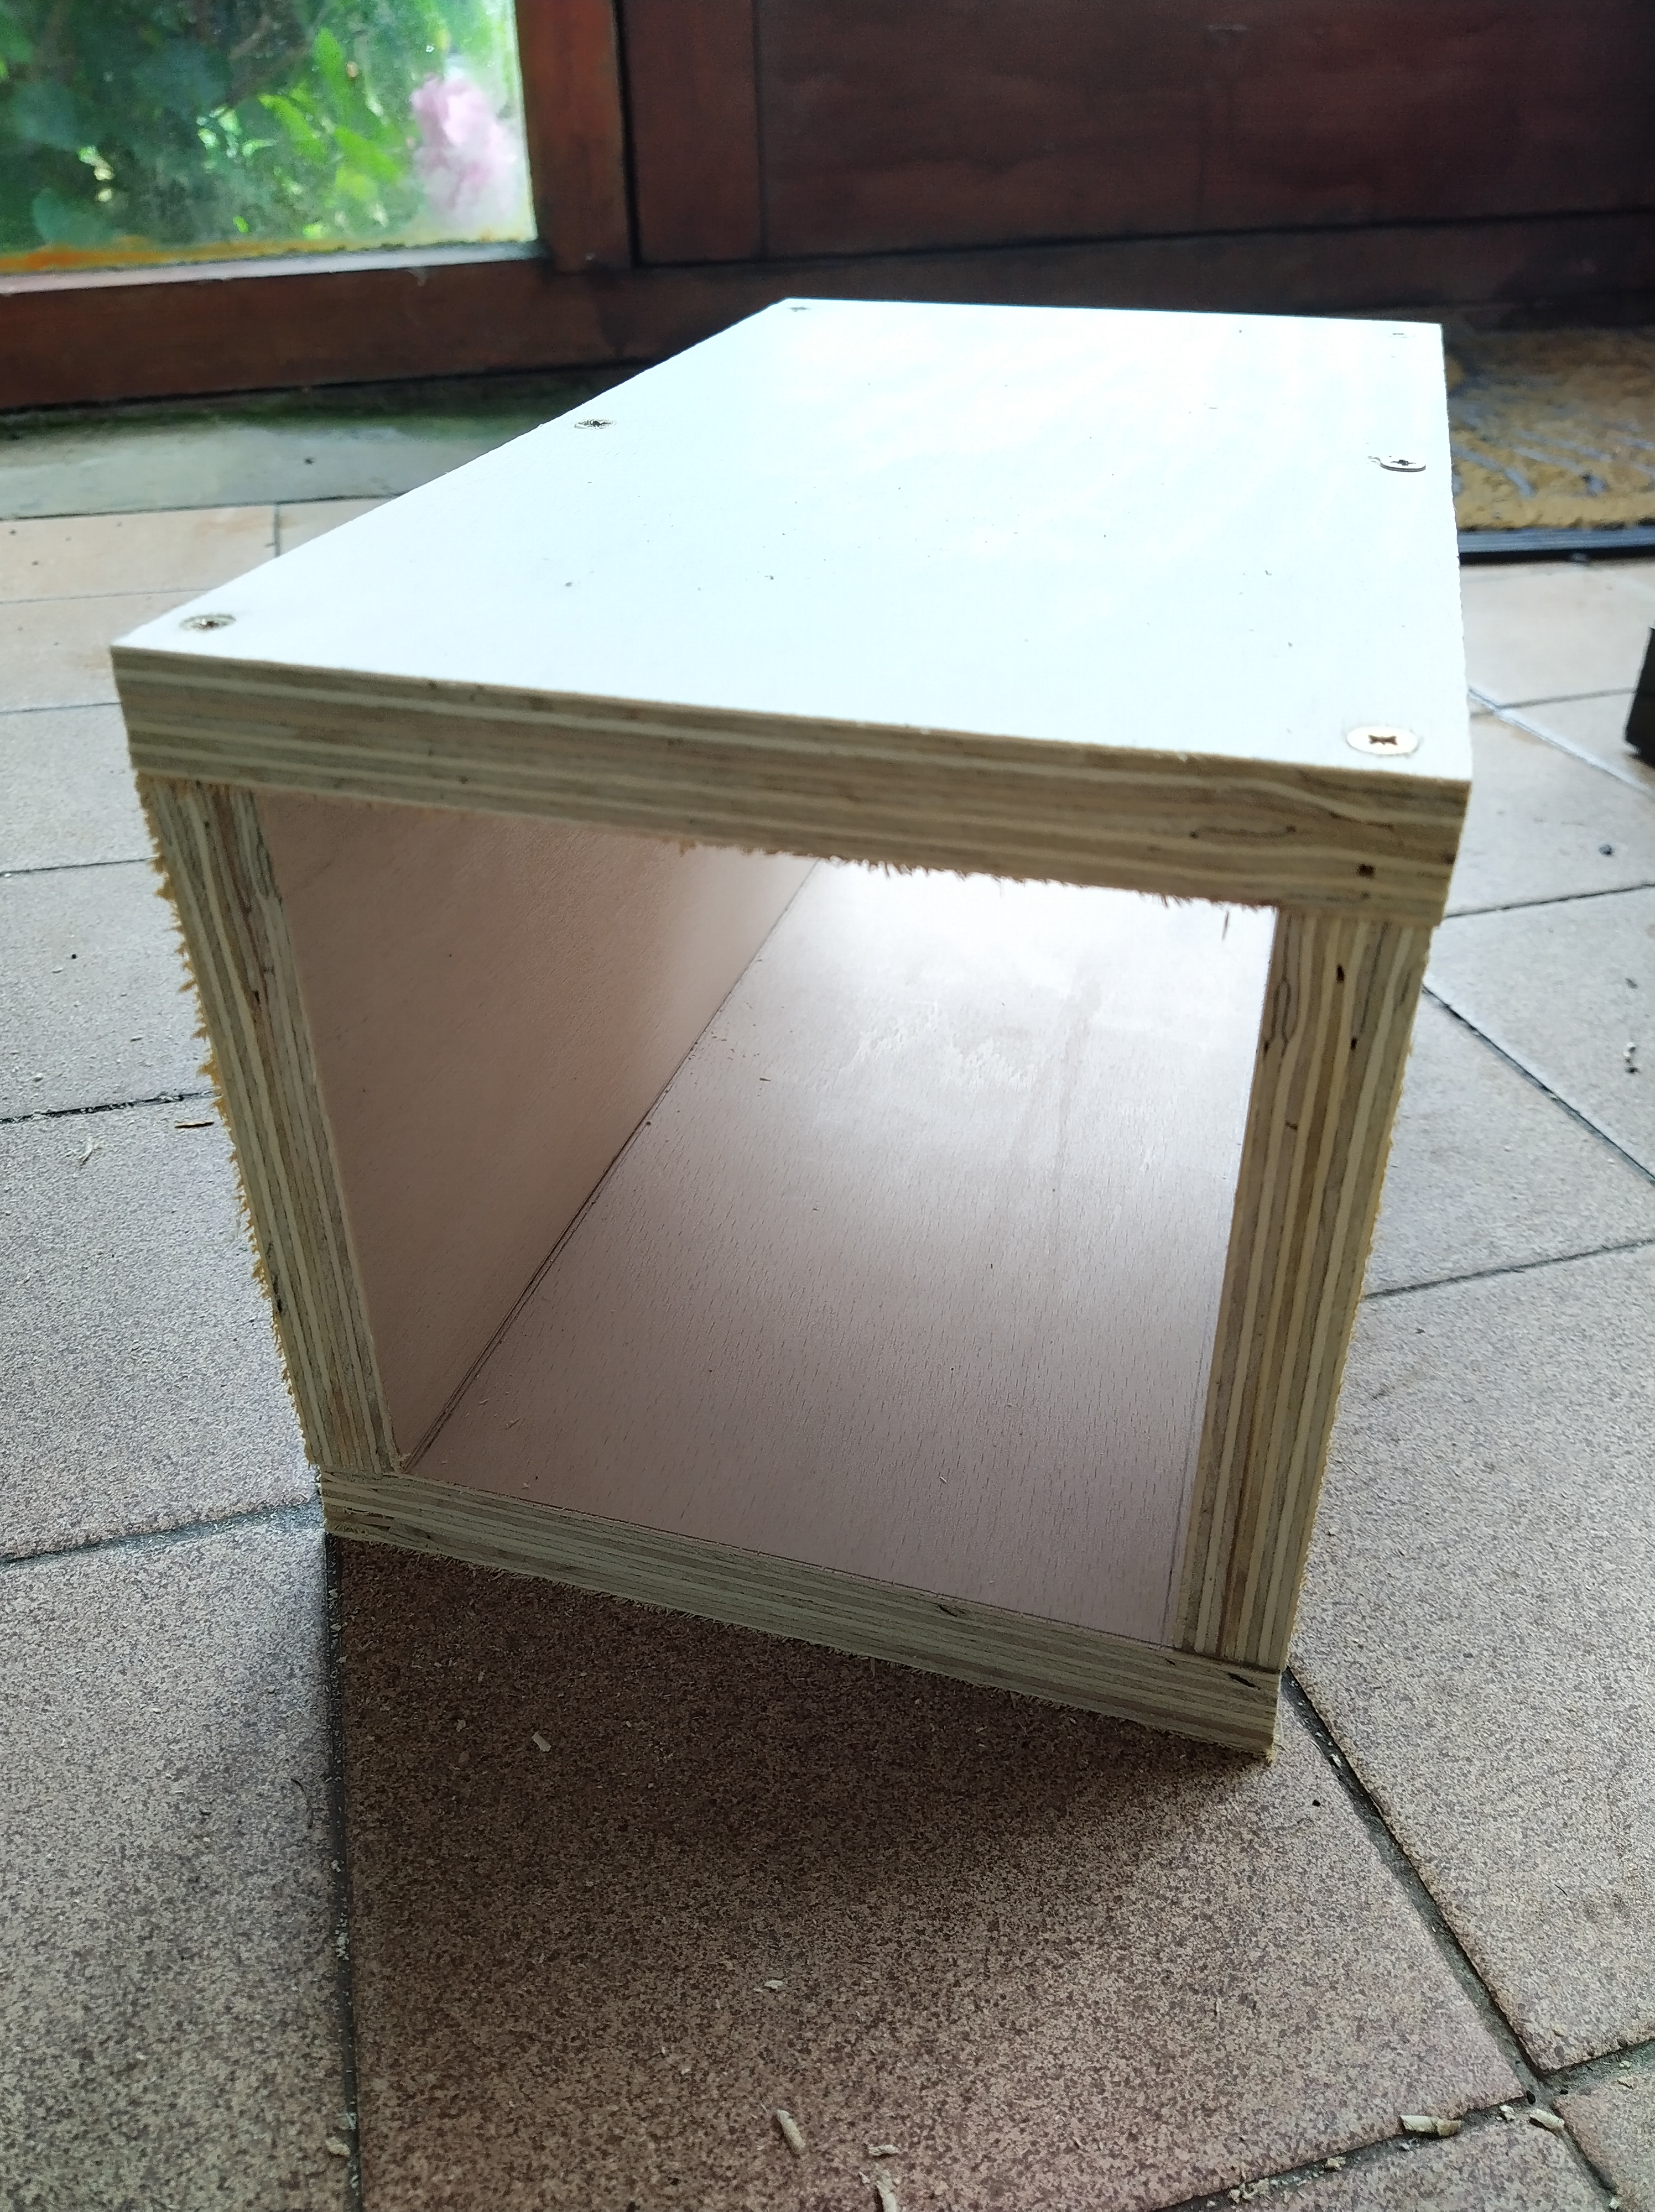
Once all of the pieces were cut out, it was time for assembly! Don’t be tempted to cut corners and not make a tunnel, as this vital to ensure that no predators can swipe into the box and attack the hedgehog while he’s in there.
This is a good point to stop and;
#1 make sure you’ve cut out all of the right pieces
#2 check they’re all the right size according to the instructions/template you’re using
#3 hold them together roughly so you can see how the pieces go together before you start assembly…you don’t want to screw the wrong bits in the wrong place!
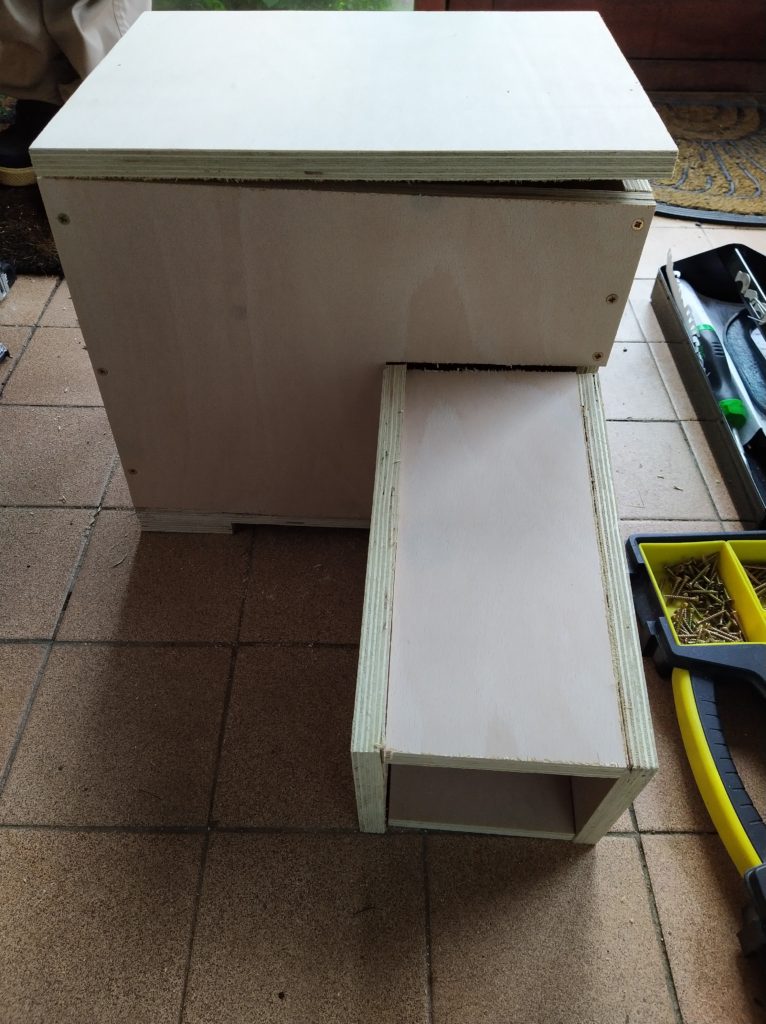
It’s important to make the tunnel separately to the main hedgehog house before bringing them all together once everything is finished. We used 1.5″ wood screws, which we drilled the holes for and then screwed in to secure the pieces together.
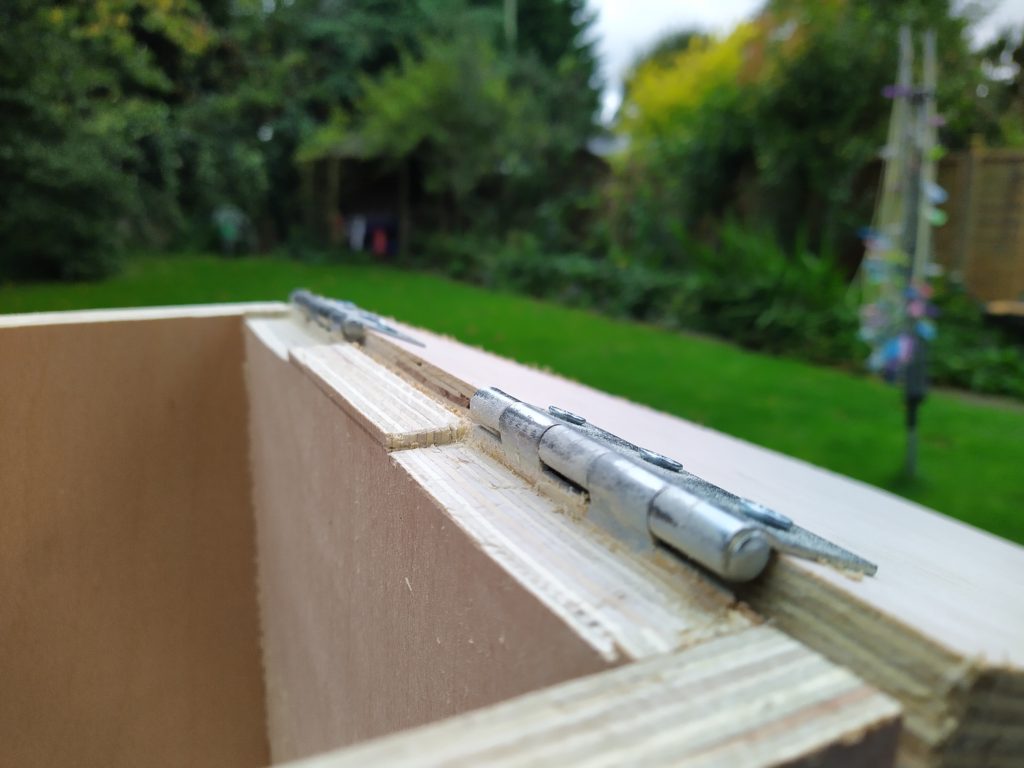
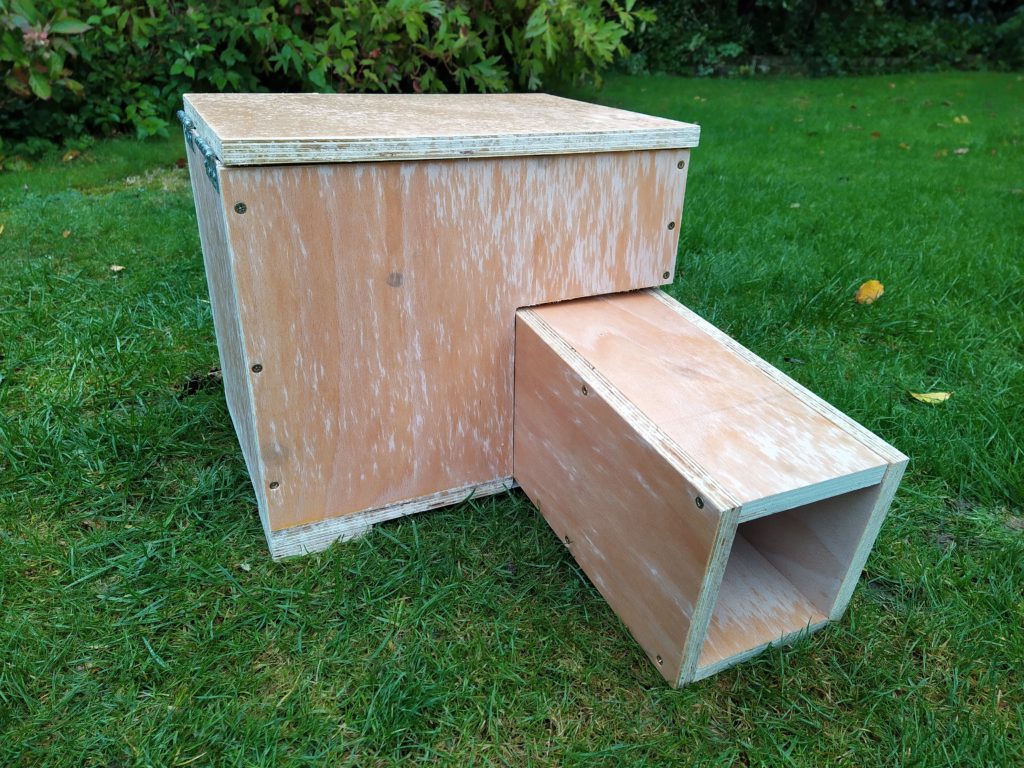
There were a few bits to the original design that we wanted to improve on, as you can see below the lid didn’t properly shut due to the type of hinges we bought. I would recommend getting some tee-hinges which mount on the outside of the box, as opposed to the standard inner ‘butt’ hinges we used. The tunnel was also just meant to slot into the gap cut out of the front, but we wanted to make this a better seal.
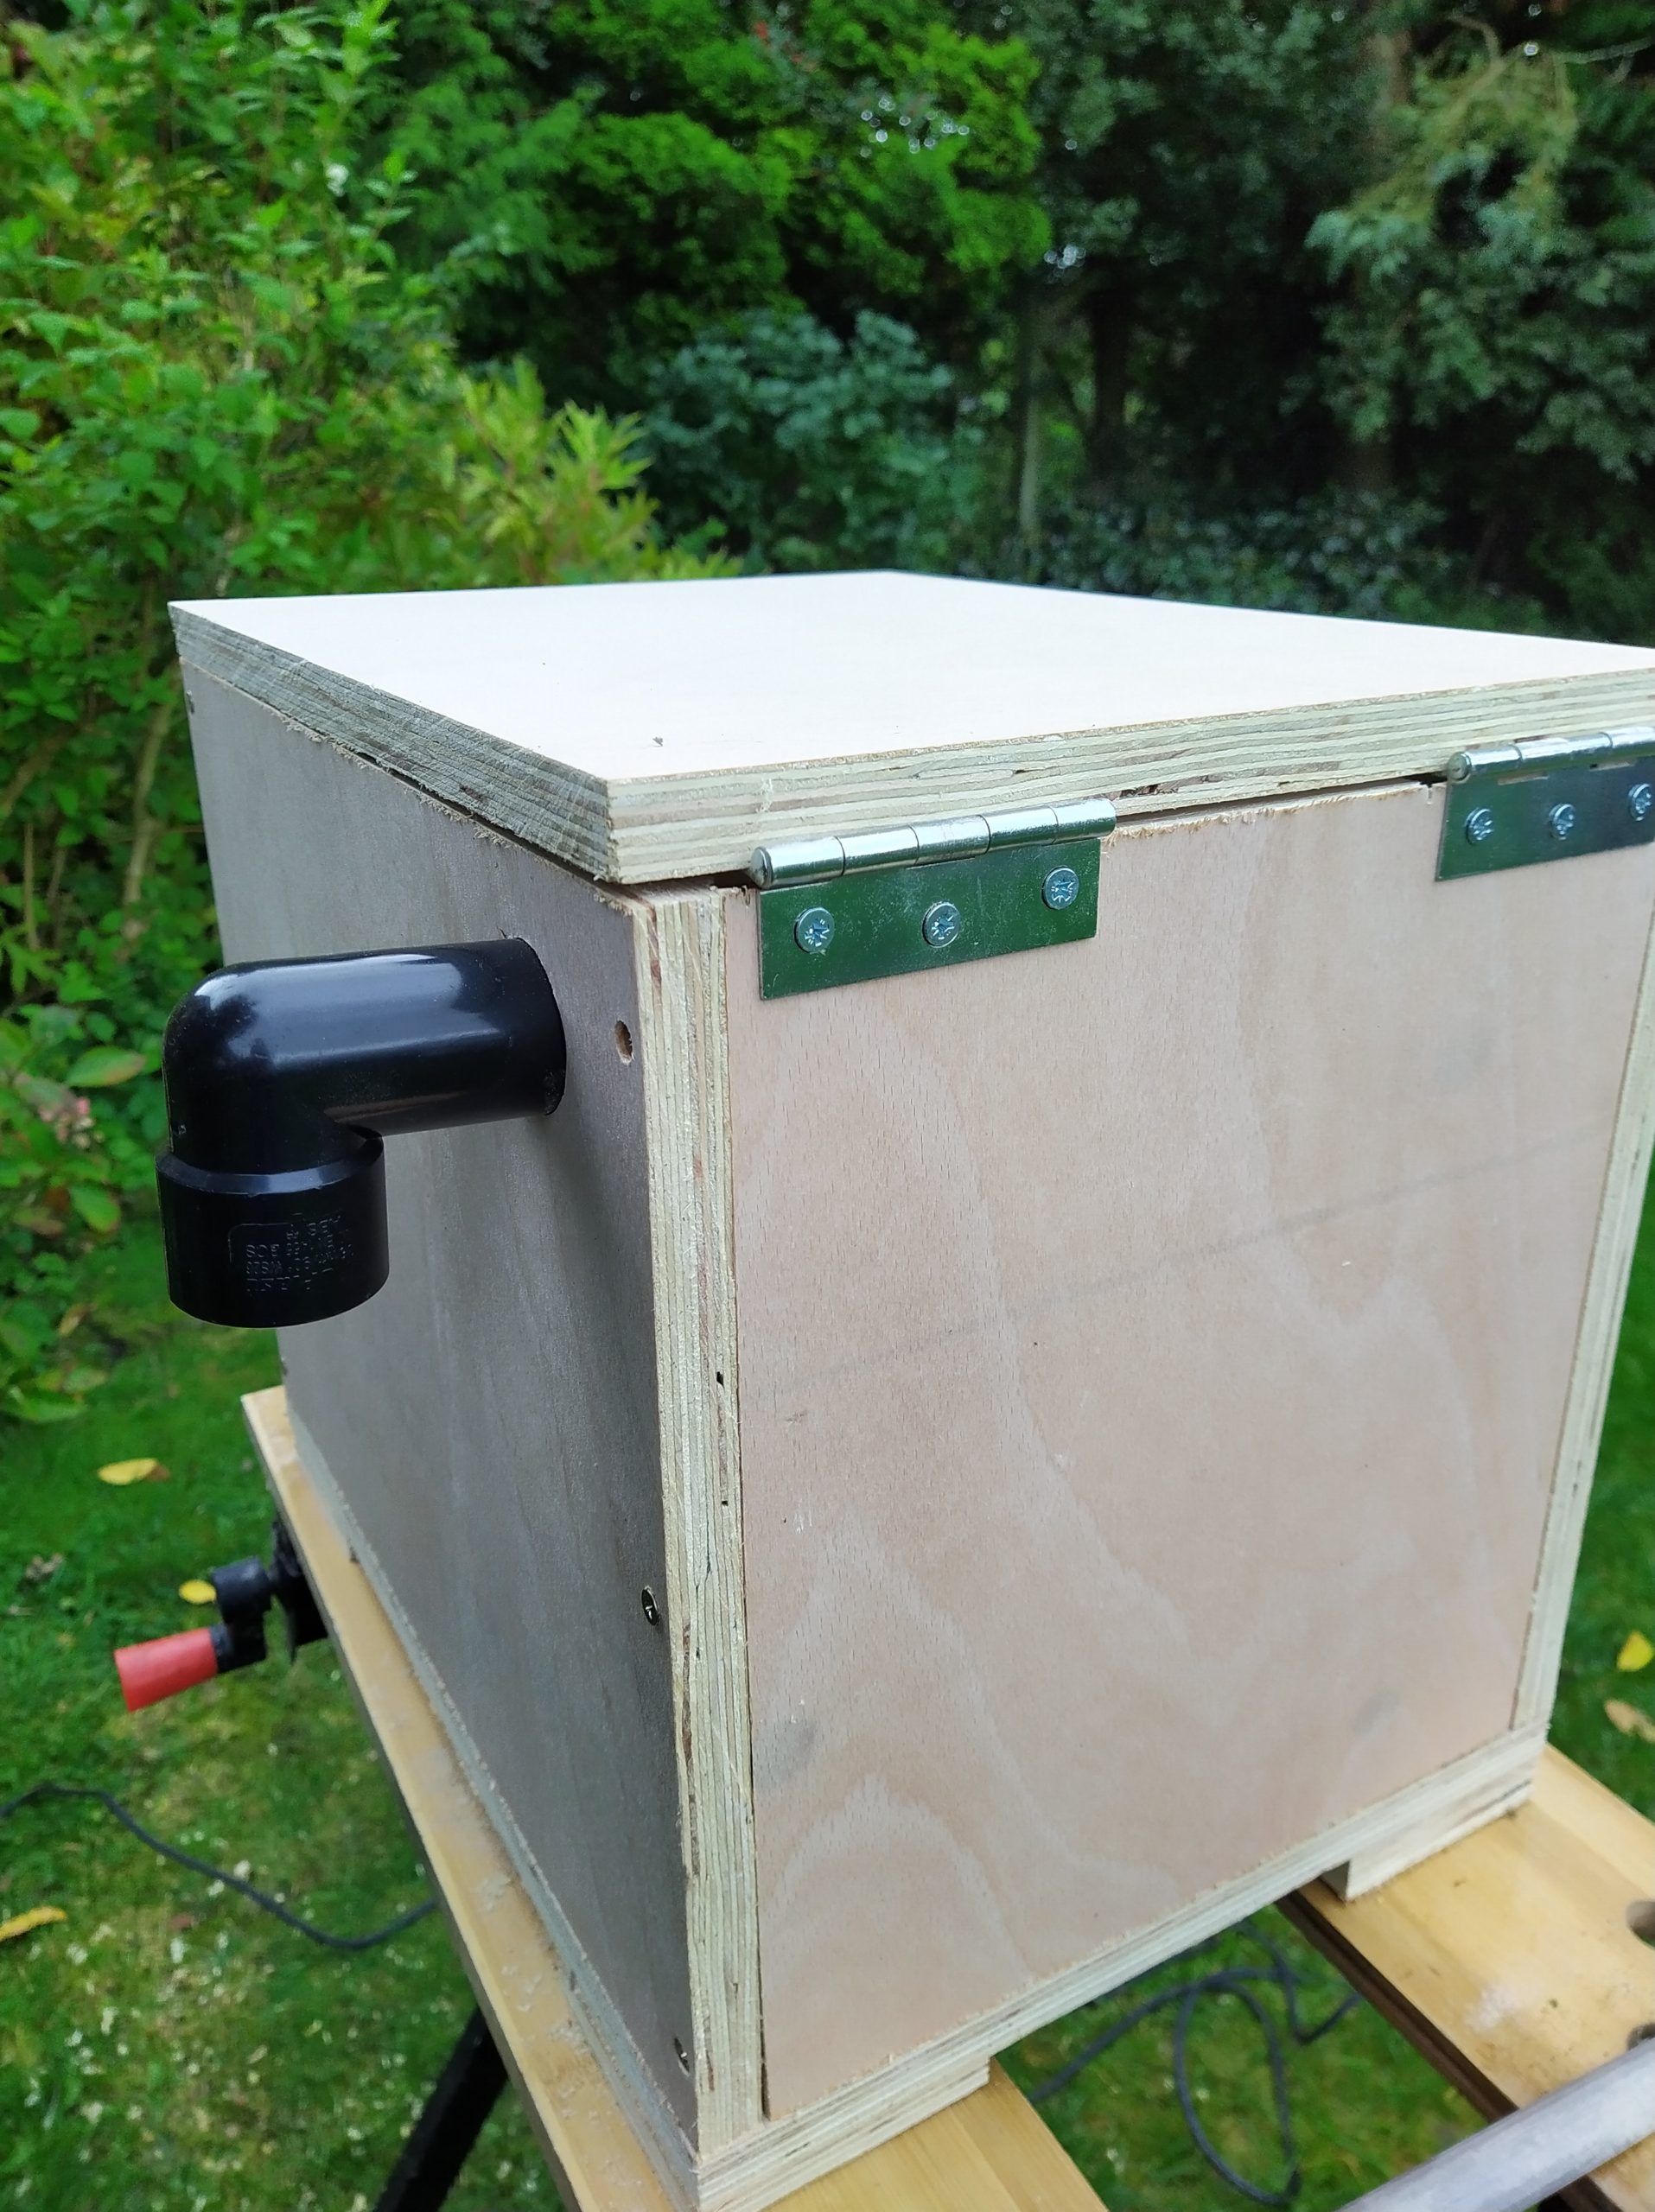
We used a plunging wood cutting attachment of a multi-tool to create cutouts in the top of the mount for the lid, which meant that the box lid would shut properly as the hinge had somewhere to sit instead of being lifted by the top of the wood. This could be avoided by using a different style of hinge, but we didn’t have any others spare to use so made this modification instead.
We also drilled a hole in the back of the hedgehog house for ventilation, which we pressed the plastic bend fitting into. Alternatively you could use some hosepipe for some extra ventilation, or miss this step out all together if you want to.
We chamfered the bottom edge and the right hand side of the cut-out area for the tunnel, and the back edge of the front board to ensure a snug fit for the tunnel. We then used Gorilla Glue to stick the tunnel in place, as we wanted to make sure it couldn’t be disturbed by predators or curious dogs. If we were to build this again we’d probably cut the tunnel out of the middle of the front board, and then secure it with wood screws either side into the front board.
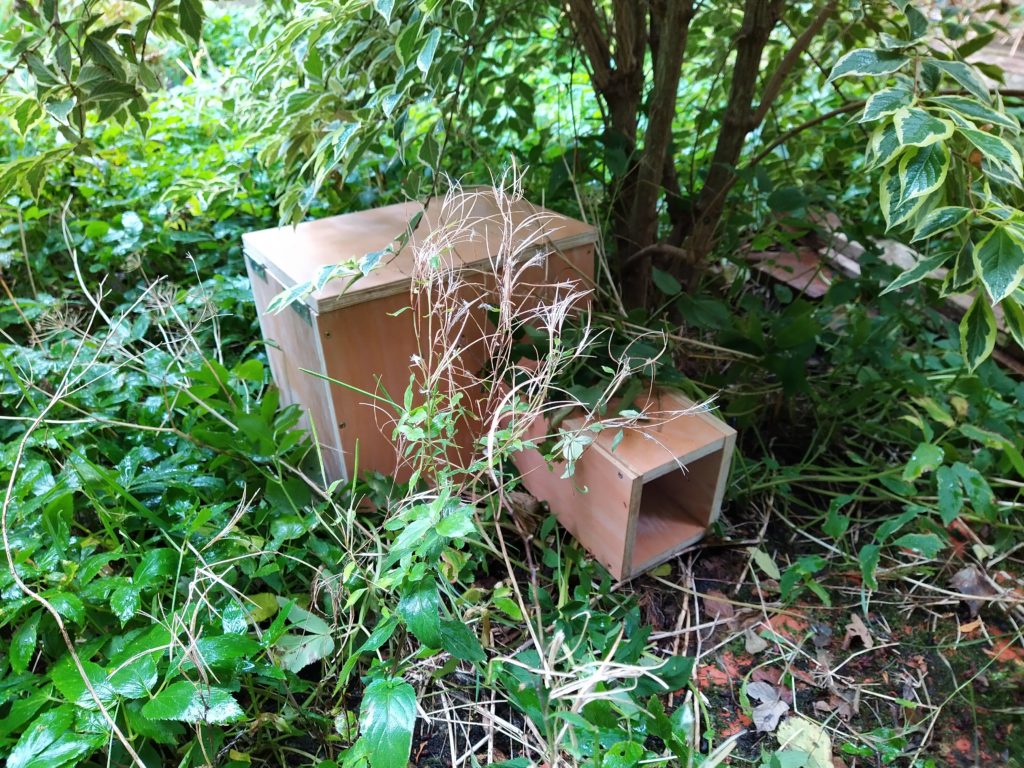
Unfortunately we didn’t have any dried leaves or grass to put inside the hedgehog house, so we put some newspaper in there and he can bring his own bedding into his new home! We chose a nice quiet wild part of the garden, which is where he was spotted in the summer. We’ve left a bowl of hedgehog food and fresh water just outside, which will hopefully encourage him to use his new home. Ideally we would make a feeding station out of a plastic box so other animals can’t get his food and drink, but this isn’t something we’ve done yet.
Useful Resources for Hedgehog Conservation:
- https://www.wildlifetrusts.org/what-do-if-you-find-wild-animal/help-hedgehog is a great resource for all aspects relating to hedgehog help, whether it be finding a sick/injured hedgehog or how to make your garden a haven for hedgehogs.
- https://www.britishhedgehogs.org.uk/ is the website for the British Hedgehog Preservation Society which also is stacked full of useful information.
- https://www.shropshirewildlifetrust.org.uk/blog/kathryn-jones/autumn-hedgehogs is a great blog post by passionate Shropshire Hedgehog Officer Kathryn about the ways we can look after hedgehogs as we move into Autumn.
As always, if you have any comments or questions on making a hedgehog house or how you can help out with hedgehog conservation, please get in touch at thefemaleengineerblog@gmail.com
Emilie
The Female Engineer